
 Track Order
Photo Tips for Personalised Photo Gifts: How to Get the Best Result

Photo Tips for Personalised Photo Gifts: How to Get the Best Result
A personalised photo gift is only as good as the photo that goes into it. Upload a sharp, well-lit image and the finished product looks professional and beautiful. Upload a dark, blurry or low-resolution file and the result will disappoint — and personalised items can’t easily be reordered once made. These photo tips will help you get the best possible result from every personalised photo gift you order.
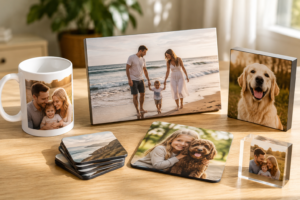
Resolution: the most important factor
Resolution determines how sharp the print looks. Photos are measured in pixels — more pixels means more detail. For most photo gifts, you need at least 300 DPI (dots per inch) at the final print size. A photo taken on a modern smartphone in good lighting is usually 12 megapixels or higher, which is more than enough for most standard photo gift sizes. The warning sign is a file that looks fine on your phone screen but appears blurry when zoomed in — that photo will print soft.
Lighting makes or breaks the result
Even lighting — soft natural daylight from a window — almost always produces the best result. Avoid direct midday sun (harsh shadows), indoor artificial light (colour casts), or dark environments where the phone struggles and introduces grain. If the photo was taken outside on an overcast day, the light is likely even and clean. If it was taken at a birthday party with mixed artificial lighting, check closely before using it.
Choosing the right photo for the product
Match the photo to the product size and shape. For a large personalised blanket or canvas print, a wide landscape shot works well. For a personalised mug or keyring, a portrait-format photo of one person with a clean background gives a clearer result than a group shot. For a personalised cushion, a square crop works best — use the cropping tool on the product page.
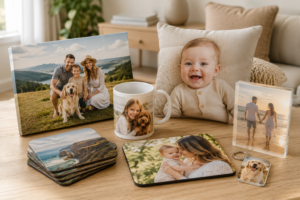
Backgrounds and composition
A simple background makes the subject stand out. A plain wall, a garden, an open sky — these all work. A busy background (a cluttered room, a crowd, a patterned wallpaper) distracts from the subject and can look noisy when printed at small sizes. If the best photo you have has a cluttered background, consider using a free tool like Canva or your phone’s built-in editor to blur or simplify the background before uploading.
Colour accuracy and filters
Heavy Instagram or Snapchat filters can shift colours in ways that look unnatural in print. Subtle filters are usually fine; dramatic colour shifts — heavy desaturation, extreme warming, vintage effects — can produce unexpected results on a physical product. Use the product preview tool to check before finalising.
Using old or scanned photos
Old family photos and scanned prints can produce beautiful personalised gifts. For the best result, scan at 600 DPI or higher. Scan in colour even for black-and-white photos — colour scans give you more flexibility. Check the scanned image at 100% zoom before uploading; if it looks sharp on screen, it should print well.
More personalisation guidance
Once the photo is ready, choose the right product from the personalised photo gifts collection. For text personalisation alongside the photo, see what to write on a personalised mug or the engraving font guide. For full gift ideas, visit personalised gifts Australia.
Testing your photo before ordering
Before uploading, zoom in to 100% on your device and look critically at the photo. Does the face or subject look sharp? Are there visible pixels, smearing or digital noise? If the photo looks soft or grainy on your phone screen when fully zoomed, it will print that way on the gift. If it looks crisp and clean at full zoom, it should print well. When in doubt, choose a different photo or scan an old print at 600 DPI.
Getting the crop right
Cropping is as important as resolution. Most product pages provide an in-browser crop tool — use it to frame the subject exactly as you’d like it printed. Remove large areas of empty space. If the product is portrait format, crop the photo to portrait. If it’s landscape, crop to landscape. A well-cropped photo on a standard product always looks better than an uncropped photo that has been automatically scaled and centred.
Photo gifts worth making
Once you have the right photo, the product choice is easy. A personalised photo mug is affordable and used daily. A personalised photo blanket turns a favourite image into a comfort item used for years. A personalised photo frame puts a treasured image on display. A large canvas makes a statement piece for a wall. Browse the full personalised photo gifts collection for all options, and see the personalised gifts Australia homepage for the complete range.
A note on digital photos vs printed originals
For recipients who have older relatives or want to use a historical family photo, scanning a physical print is often the only option. The key difference between scanning and a digital photo is that scanned prints rarely exceed their physical resolution — so a small physical print scanned at 300 DPI will be lower resolution than a large print scanned at the same setting. Always scan at 600 DPI or higher to give yourself the best working resolution, and preview at 100% on screen before uploading. A grainy, pixelated preview will produce a grainy, pixelated gift — no amount of confidence in the printing process can fix an under-resolution source file.
Using your phone camera for the best results
Most modern smartphones — mid-range and above — capture images at sufficient resolution for standard personalised photo gifts. The key is to shoot in the best available light (natural, even, indirect), hold the phone steady, and avoid the digital zoom function (which crops and degrades the image rather than optically zooming). Portrait mode on modern phones produces beautiful depth-of-field effects but can sometimes complicate background removal or blending if the product page editor works with the raw image. When in doubt, shoot in standard camera mode rather than portrait mode for photo gift uploads.
Summary: the four-point photo checklist
Before uploading a photo to a personalised gift product: (1) zoom to 100% on screen — does it look sharp? (2) Is the lighting even and natural? (3) Is the background simple or will it distract from the subject at product size? (4) Is the photo cropped or cropped-ready for the product format? Check all four and you will almost always get a result you’re happy with. For the full range of products that take photo personalisation, visit personalised photo gifts Australia.
Preparing your photo before you order
A few minutes of preparation makes a noticeable difference to the finished gift. Start from the original file rather than a screenshot or a version saved from social media, as those are heavily compressed and lose detail when enlarged. Crop loosely so there is room around the subject for the product’s print area, and avoid zooming in on a small image — enlarging a low-resolution photo only magnifies the blur. If the photo is slightly dark, a gentle brightness lift usually helps, but resist heavy filters, which can print very differently from how they appear on a phone screen.
For multi-photo gifts like a photo collage or canvas, choose images with a consistent feel — similar lighting and tone — so the finished piece looks cohesive rather than patched together.
Choosing the right photo for the right product
Different products flatter different photos. A close-up portrait works beautifully on a photo mug or a small frame, while a wide landscape or group shot suits a photo blanket or a large canvas where there is room for detail. Consider the product’s shape too: a square crop sits awkwardly on a tall portrait frame. Matching the orientation of the photo to the orientation of the product is a small step that quietly lifts the final result.
Final checks before you upload
One last look saves disappointment. Open the photo at full size and confirm it is sharp, well-lit and correctly oriented for the product you have chosen. Make sure faces are not too close to the edge of the print area, and that the file is the original rather than a compressed copy. Because every photo gift is made to order from the image you supply, the quality of that file sets the ceiling for the finished result — a clear, considered photo is the single biggest factor in a great outcome.
Frequently Asked Questions
What resolution should my photo be for a personalised photo gift?
Aim for at least 300 DPI at the intended print size. For most photo gifts, a photo taken on a modern smartphone in good light is sufficient.
Can I use an old scanned photo for a personalised gift?
Yes — scanned photos work well if the scan is high resolution. Aim for 600 DPI or higher when scanning to give the print the best chance of looking sharp.
What if my photo is blurry? Can it be fixed?
Blurry or low-resolution photos cannot be sharpened to a standard suitable for print. Use the clearest version available — check the product page for minimum resolution guidance.
Does lighting matter in the photo I submit?
Yes — well-lit photos with even natural light produce the best results. Avoid strong shadows across faces, harsh flash, or very low-light images.
Can I crop or adjust my photo before submitting?
Most product pages allow basic cropping in the upload tool. For major edits, adjust the photo before uploading using your phone’s photo editor or a free tool like Canva.
What backgrounds work best for personalised photo gifts?
Simple, clean backgrounds let the subject stand out. Busy or cluttered backgrounds can distract from the main image — especially on items like mugs and cushions.
Are group photos suitable for photo gifts?
Yes — group photos work well on larger items like blankets and canvases. On smaller items like mugs or keyrings, a single subject with a clean background gives a clearer result.
Can I use a black-and-white photo for a colour product?
Yes — a black-and-white or sepia photo can look striking on many personalised products. Check the product preview to see how it will appear.
Ready to create a personalised photo gift? shop personalised photo gifts.

